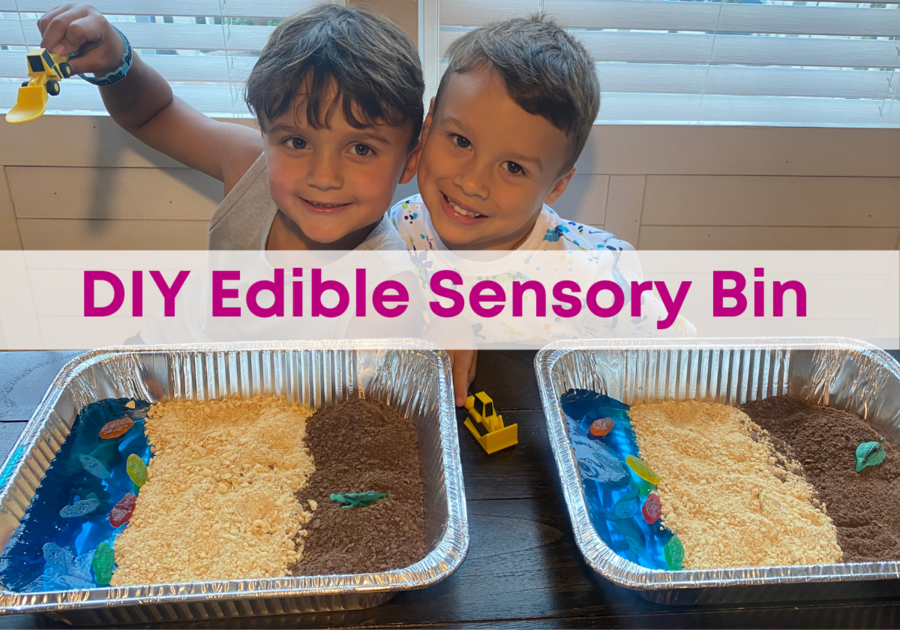
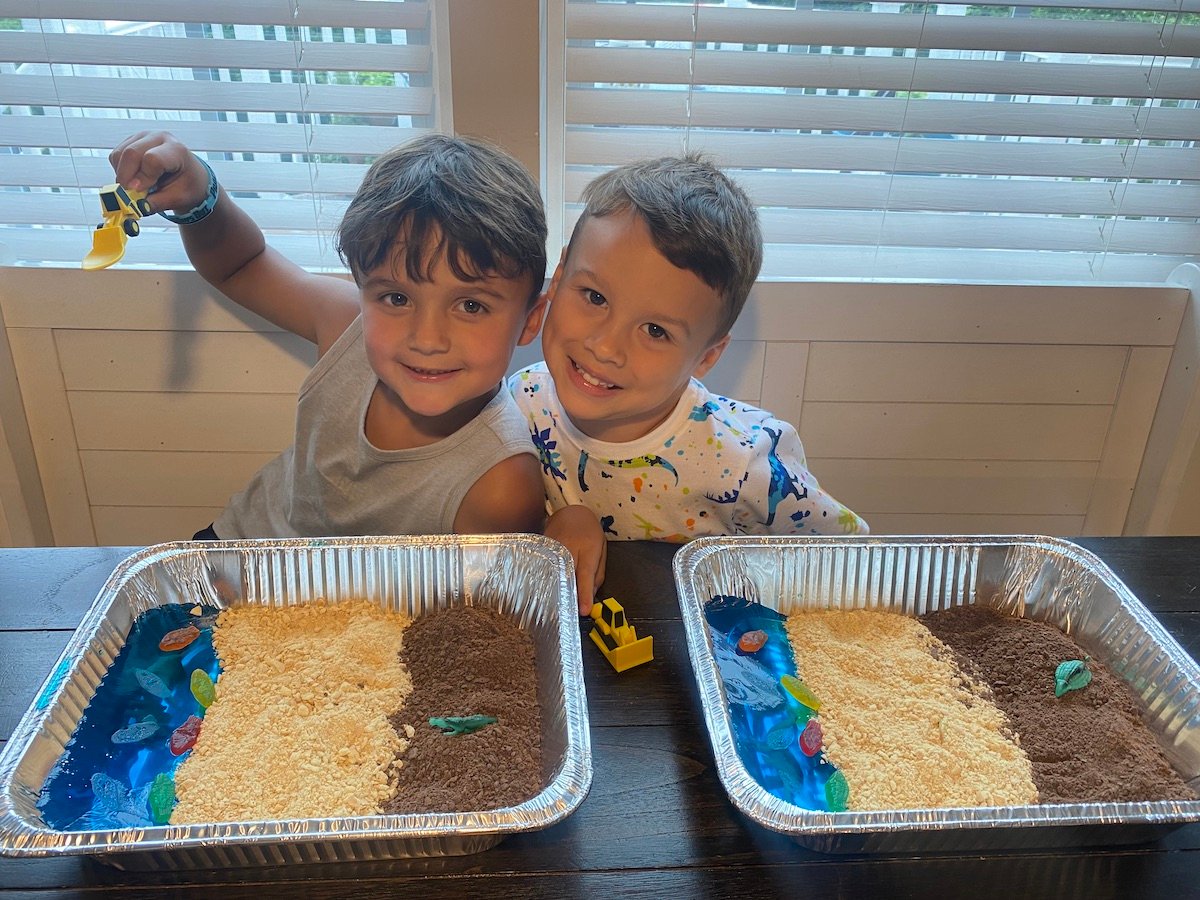
My input seeking kiddos love a good sensory bin, so when I came across the inspiration to make an EDIBLE sensory bin, I knew that I would be speaking their love language the next time we were looking for fun things to do!
My parent's of toddlers who put everything in their mouth anyway are probably wondering,
"what's the difference between a normal sensory bin and an edible one?"
and the answer is REAL food you are ok with them eating! 🤣
Because tactile sensory play is so important for our small humans AND I can typically pull these DIY sensory bins together for only a few dollars, we tend to make a lot of them in this house (check out our Rainbow sensory bins HERE and our Winter Wonderland sensory bins HERE). I also feel like my 5 and 9 and still want to eat everything they see, so I couldn't resist in giving these edible sensory bins a try! Don't you kinda want to make an extra one for you to play in?!
***WARNING!***
Putting small plastic toys in an edible bin could pose a choking hazard. Please only attempt under competent supervision and do NOT allow child to put toys in mouth.
 |
Everything I needed, I was able to buy from the dollar tree, minus the jello. These bins cost $7 to make 2!
Supplies needed:
👩🍳 2 aluminum trays
🦖 2 packs of plastic dinosaurs - we used dinosaurs, but they make water creatures, animals and more! For smaller children, you could omit the toys and just use animal cookies.
🦁 Animal Cookies (plain and chocolate)
💙 The blue jello was a little harder to track down, but I found that at Walmart.
🐟 Swedish fish (or goldfish crackers)
🔪 blender
From start to finish, this was super simple and wildly satisfying for my littles. They couldn't believe they were going to be able to play with their food! The hardest part was rearranging my refrigerator to have enough room to place four jello pans on an angle! 😂
 |
Process:
1) Before you get started, I suggest clearing off a shelf or two in your refrigerator and washing your dinosaur toys.
2) Make your jello according to instructions.
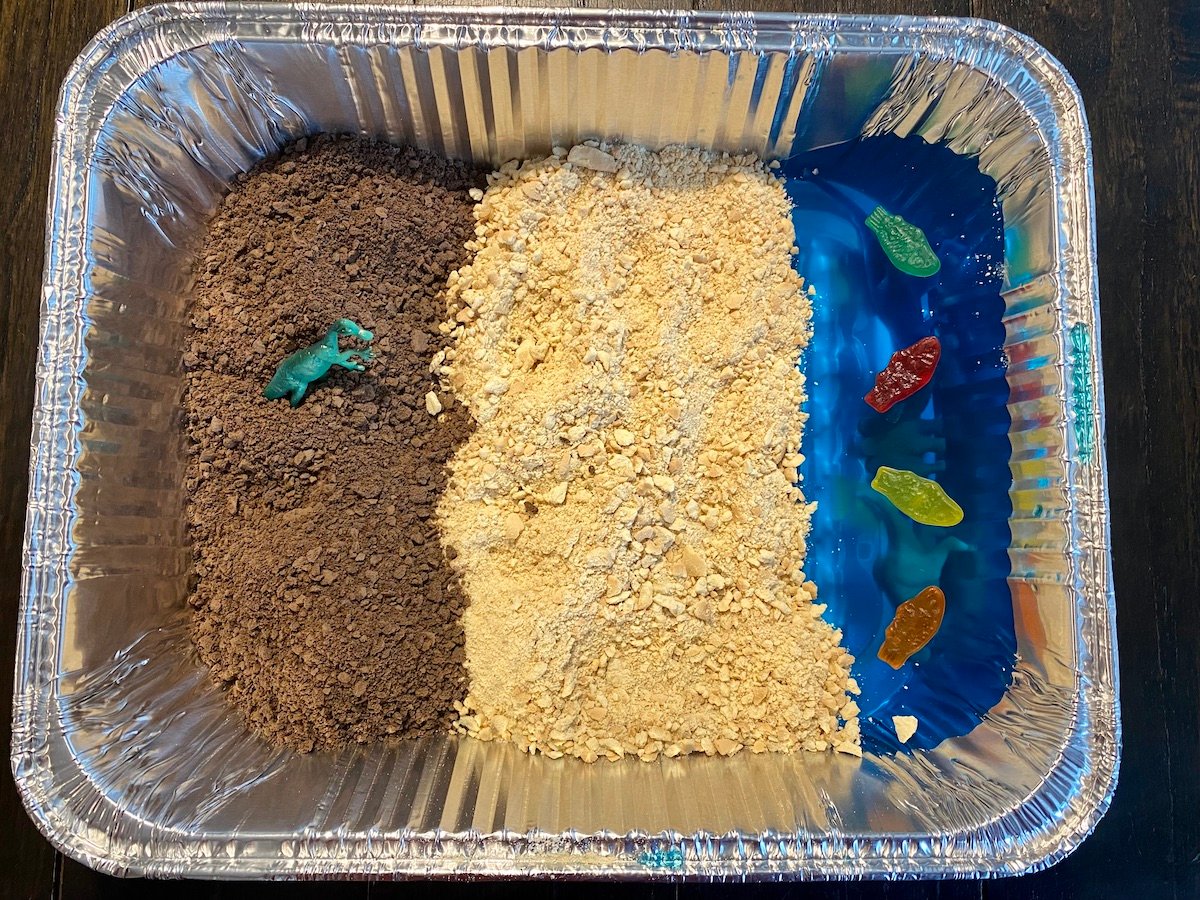
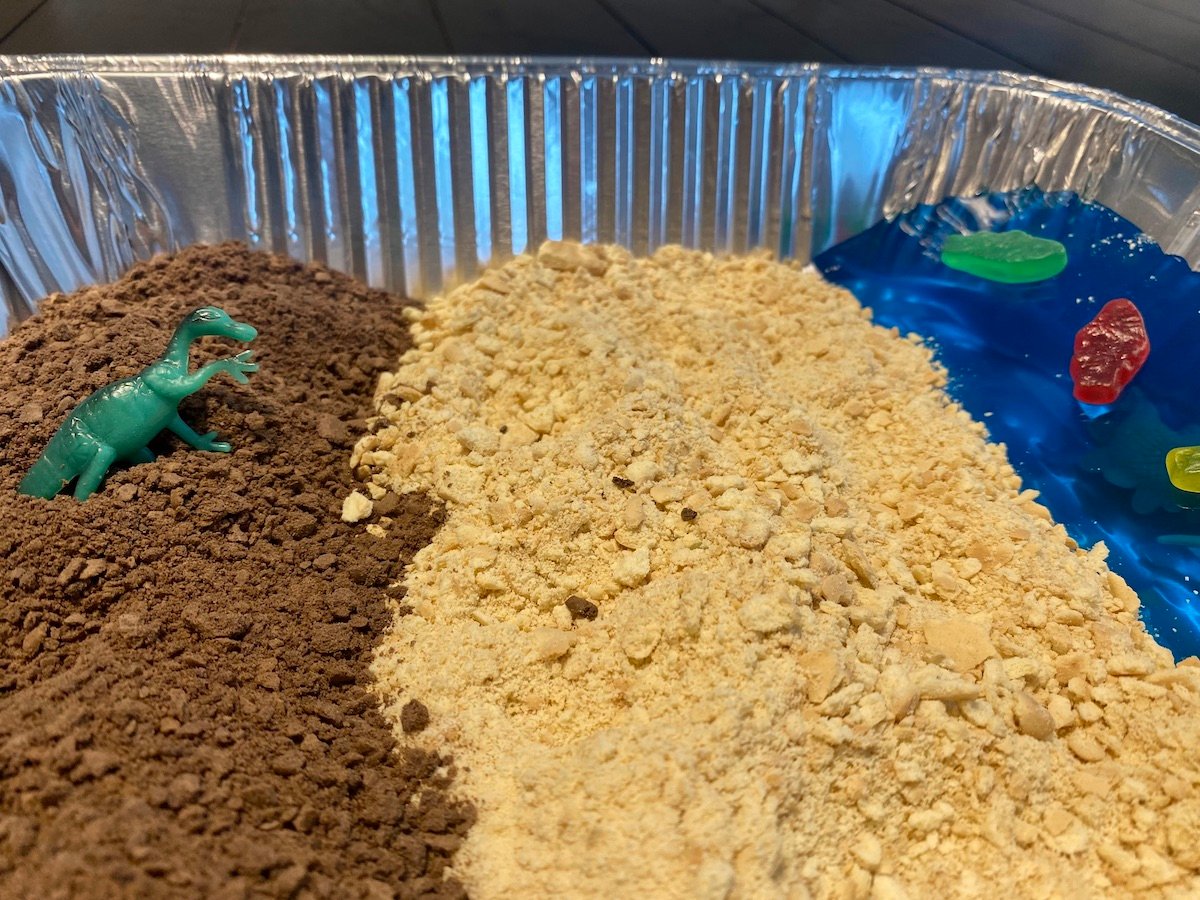
3) Place a few of your clean dino's on one side of your aluminum pan. You will pour a small portion of the prepared jello in the pan, then place it in the refrigerator at an angle, so it cools as if your dinosaurs were underwater. I used my empty jello boxes to prop up the pans.
***Side note before the next step - I TOTALLY regretted not saving a few animal cookies to hide in the dirt/sand or place on top of the sensory-scape for the kids to play with; so if you do this and use them in yours, please tag me @macaronikidsouthhills, so I can see how cute they are!!
4) After your jello has set, it's time to create the sand by crushing the plain animal cookies in the blender. Spoon the "sand" so it layers on top of your water. Bury a few dinos (or animal cookies) in the sand
5) Repeat this process with the chocolate cookies for the "dirt," layering it over the sand, burying some goodies.
6) Garnish with remaining dinos and fish and then dig in!!
 |
Here was our first attempt at making edible sensory bins! Tag yours with #findyourfamilyfun or #pghmackid, so we can see your creations!!