Salt Dough ornaments are a throw back to a classic time and Macaroni Kid says-- it's TIME AGAIN! Salt Dough ornaments are a bit of a layered process so they're not an immediate gratification project, most assuredly. However, the end result is high impact with little cost deponent upon how crafty you get! It goes without begin said, that like most recommended Mac Kid activities we do, this one can be tailored to any crafting level!
There are literally endless possibilities for decorating salt dough ornaments and it all starts with a simple base dough of
RECIPE
1 cup plain flour
1/2 cup salt
1/2 cup water
Mix together and knead into a ball. It should not be soggy and should be like pie dough. Roll out to 1/4 inch thick or so. Use cookie cutters, free handed cutting or cookie molds to make a plethora of ornament types! You can even mold like play dough.
STRINGING
With any ornament or cutout that you make, think ahead to "stringing" or hanging.
You'll need to stamp a hole in any ornament you'd like to showcase on a string, hook or ribbon BEFORE you bake them. Once baked, it's virtually too late to poke a hole. You'll have to attach a ribbon or string an alternative way ie: hot glue.
BAKE
Baking these ornaments at a low temperature, ensures that they are rock solid and not as fragile as you'd think dough ornaments would be. Bake at 200 degrees for at least 4 hours +. Flipping them if you can, every hour or so. Check the backs to be sure they're not spongy!
Once they are cooled they are ready to paint.
SEAL
USE A MODGE PODGE or ACRYLIC SEALER to first seal the front and the back of the ornaments. The paint will go on so much smoother! You CAN paint acrylics on top of unsealed paint dough. It WILL work but we noted that some of the salt pulled the paint a bit and made it dry really fast. The look wasn't as SMOOTH as we'd like and we opted instead, to first SEAL them then paint them, then FINAL seal them one last time.
PAINTS
Use acrylic paints to detail your ornaments however you see fit.
We used traditional colors as well as bright bold colors! 
STAMPING
Stamping is a FANTASTIC OPTION.
HOWEVER, stamping was a bit tricky because I attempted to stamp AFTER I PAINTED AND SEALED. I had to rough up the area ( it was too slick for the stamp to -- stamp. It slid right off! ) with a nail file. The stamp also never dried well enough to overcoat it with sealer. It started to smudge a bit.
I do think if you paint first, then stamp, let it dry, THEN seal-- you'll have an easier time. However this was a super easy way to decorate them and it was seriously adorable. I got a set of Martha Stewart Christmas card stamps for about $4.00 at Michael's!
STAINED GLASS
Melt pony beads at a high temperature. This requires a different type of process. Use parchment paper to line your baking sheet.
Cut out the center of your ornament.
Fill it with transparent pony beads.
Cook at 350 F degrees for about an hour to an hour and a half. ( that's how long it took mine) The salt dough will turn a little browner than normal but you need the higher temp to melt the beads. Let them cool and peel them off the parchment paper when done!
PAINTING DETAILS
Your paint brushes will work wonders. The better variety of paint tip sizes, the more you'll be able to do detail wise. Small details like eyes and tiny dots require a smaller paintbrush and you'll like the end result better than if you tried to use a big fat brush!
If you mess it up, don't' worry. Just paint OVER it once it dries. Let each coat DRY appropriately though, or the paint will start to peel off!
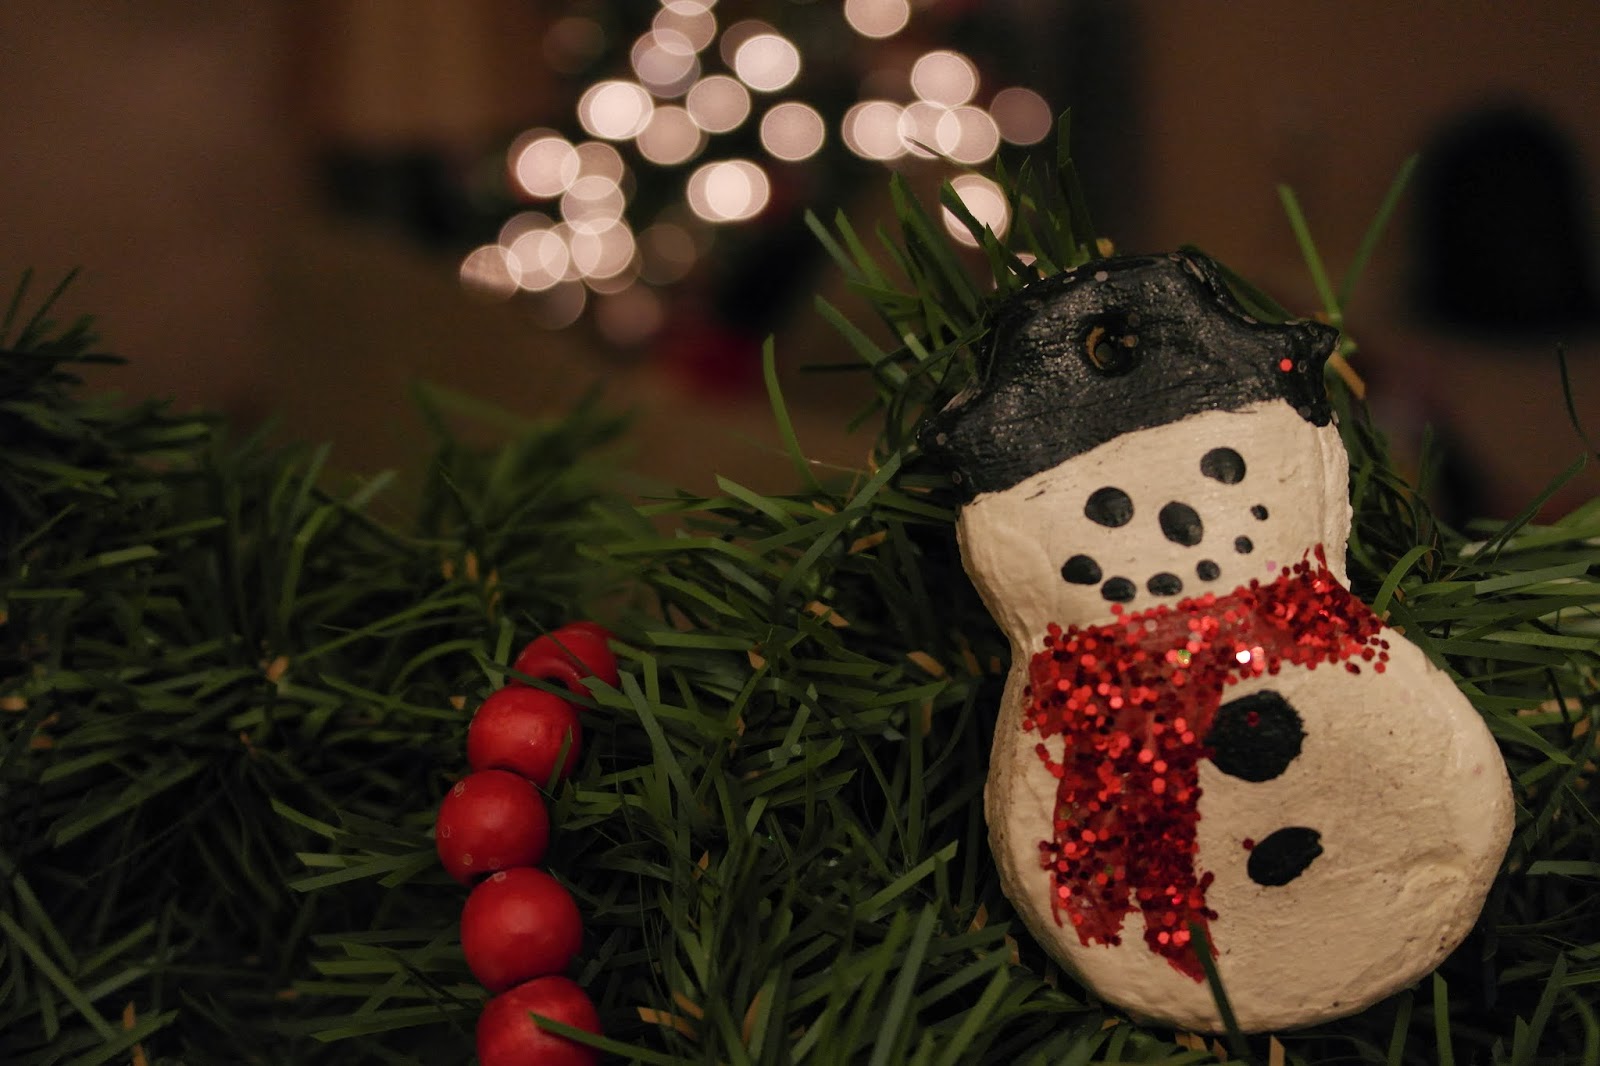


Glitter fixes EVERYTHING and we found that BASIC SCHOOL GLUE held glitter the best. While we LOVE craft glue like "Aleene's" we had to really play around with thinning it down. At times it was way too thick and even peeled our entire glitter layer off.


Chalkboard detailing is all the rage and we didn't' forget about this one. These make LOVELY ORNAMENTS and they use some of the simplest shapes to create a high impact ornament!
Simply paint black or a very dark grey and use a white paint marker to embellish.
No matter how you slice it, paint it or shape it--- salt dough is a great classic that makes for even GREATER FAMILY TIME MEMORIES.